Home > Apps > App: Content
App: Content
Client Objects
Add Client Objects to the App
- User taps on “Add” button to open the “Select Client Object” Pop Up
- Check mark all client objects to be used in the app
- Once select, user can select a special client object for the app.
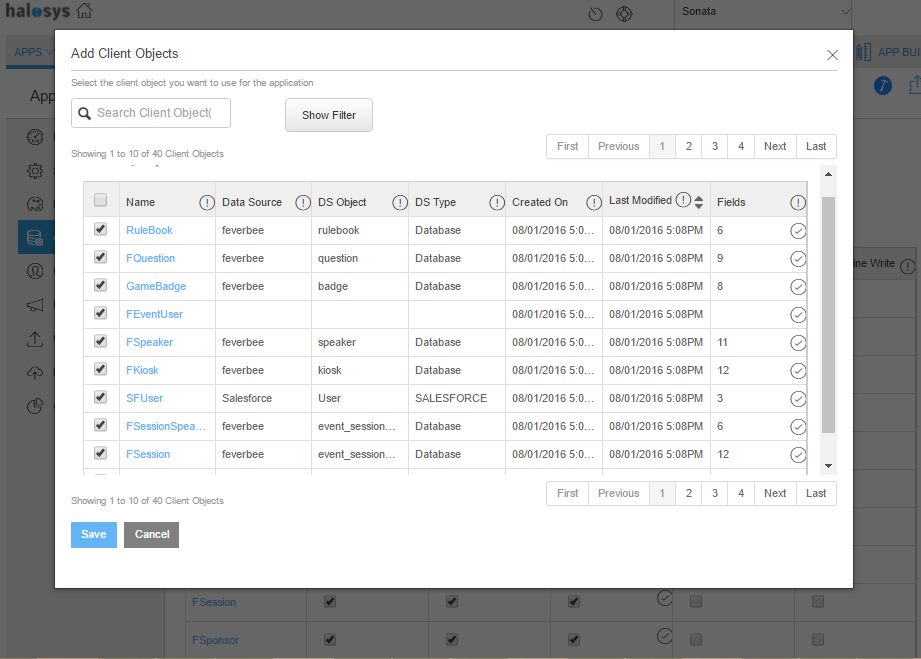
- Search for the client object by client object name
- Filter client object by “Data Source” and “Data Source Type”
- User can add new client object by clicking on “Add New Client Object” Link
Once completed client object selection, user taps on “Save” to save the client object selection.
Manage Client Objects
The selected client objects from step 1 will display on the Content Screen. From here, user can manage the client object data access options as follow:
- Create
- Update
- Delete
- Optimistic Locking
- Enable Offline Write
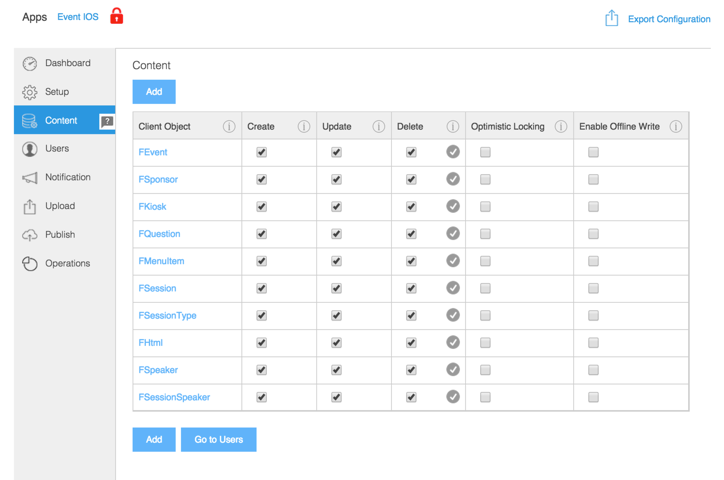
Special Client Objects
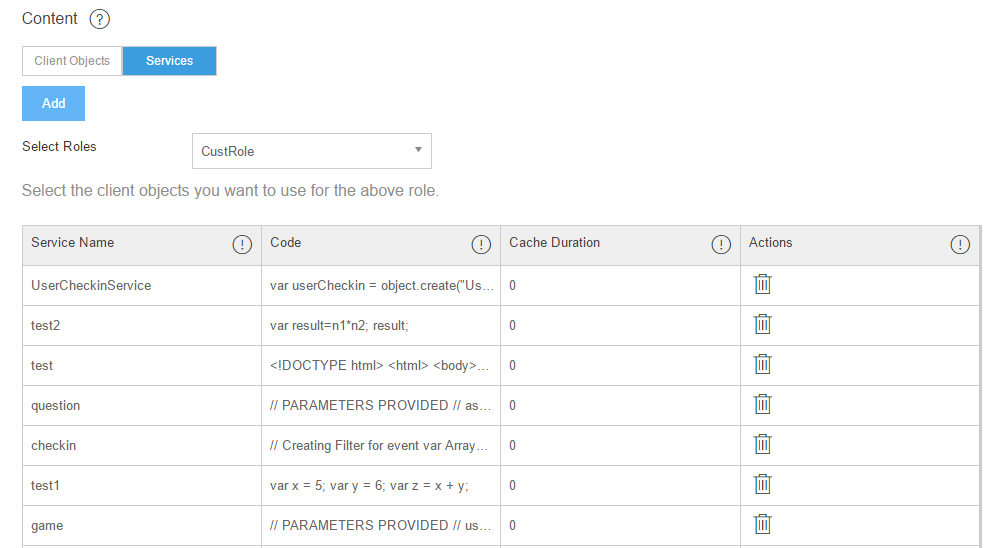
Services
Add Services to the App
- User taps on “Add” button to open the “Select Services” Pop Up
- Check mark all Services to be used in the app

- User can add new Service by clicking on “Add New Service” Link
- Once completed Service selection, user clicks on “Save” to save the Service selection.
The selected Services will be displayed on the Content>Sevices Screen.